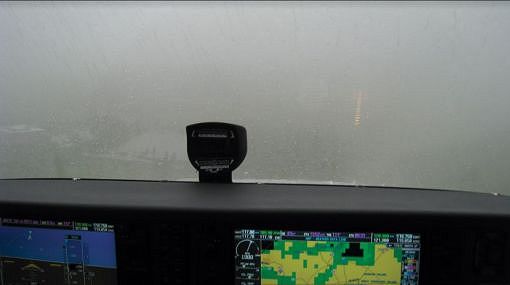
The Importance of Lights
Making the Most of Approach Lights
A favorite information morsel from instrument training is “being able to descend to 100 feet AGL when you can see only the approach lights.” That’s too bad, because it belittles a beautiful piece of information design by turning it into a tool for aviation trivia night. It’s also wrong most of the time.

Let’s get the FAR misunderstanding out of the way first. The relevant snippets of FAR 91.175 are:
(c) … no pilot may operate an aircraft, except a military aircraft of the United States, below the authorized MDA or continue an approach below the authorized DA/DH unless—
(1) The aircraft is continuously in a position from which a descent to a landing on the intended runway can be made at a normal rate of descent using normal maneuvers …
(2) The flight visibility is not less than the visibility prescribed in the standard instrument approach being used; and
(3) Except for a Category II or Category III approach … at least one of the following visual references for the intended runway is distinctly visible and identifiable to the pilot:
(i) The approach light system, except that the pilot may not descend below 100 feet above the touchdown zone elevation using the approach lights as a reference unless the red terminating bars or the red side row bars are also distinctly visible and identifiable.
(ii) The …
Section (3) lists nine more things that fall into the general categories of “paint, pavement, or lights.” Summing all of this up it says: You can’t descend past DA/MDA unless you’re in a position to land and you have the required visibility and you have one of the references in sight. You need all three; in the U.S., anyway.
Nine of the references are on the runway, which means it’s entirely possible to reach DA or MDA, be in a position to land, see the approach lights—because they’re right in front of you, but not have the required visibility to descend further.
Thus, the approach lights are not a free ride to 100 feet AGL. (The forthcoming FAR 91.176 might be, if you have an enhanced vision flight system, but that’s another topic.)
The approach lights, however, are a great way to measure your visibility as well as bridge the gap between flying on instruments and a well-placed landing flare — if you know what you’re looking at.
The Whole 900 Yards: ALSF-2
Actually, a full ALSF-2 approach lighting system is usually 2400 feet, which is 800 yards, but I couldn’t resist the headline. It’ll also help you remember that this “Approach Light System with Flashers version 2” is the one with all the bells and whistles. Some sources say the “2” means it’s designed for Cat-II approaches. Take your pick; it’s what you’ll see on runways with Cat-II and Cat-III ILS approaches.
Approach lights accomplish two tasks: orientation and measurement. If the approach is close to minimums, both things happen in a couple seconds, so it pays to understand everything the lights tell.

It’s helpful to think about the ALSF-2 as having an outer section and an inner section. The outer section usually consists of 14 rows of five white lights placed every 100 feet. I say “usually” because for an ILS with a glideslope of less than 2.75 degrees, six more rows are added further from the runway, making the whole system 3000 feet instead of 2400 feet.
This is really important. On a flatter glideslope, you’ll be further from the threshold when you reach a standard DA of 200 feet above touchdown zone elevation (TDZE). If those extra lights weren’t there, filling the space between you and the runway, the entire light system would appear too far away—and you’d believe you’re too low. There’s a good chance in low visibility, you’ll see the approach lights several seconds before you can see a visual glideslope indicator (a.k.a., a VGSI, such as a PAPI or VASI).
Conversely, reaching DA on an unusually steep glide path can give the impression that you’re too high. The takeaway is that if the descent angle has worked for the entire approach until now, don’t let the lights convince you to change it before you see a VGSI.
In addition to the 14 rows of white lights, the outer section of the ALSF-2 lighting contains flashing lights timed for an illusion of a white ball traveling towards the runway twice per second. This aids your acquisition of the lights — we naturally look to flashing things — and suggests the best direction to search if you want to find a safe place to land. That’s useful orientation.
The inner section of the ALSF-2 begins 1000 feet from the threshold with a 100-foot-wide bar of white lights. Sometimes called the “decision bar” or “roll bar,” one of its jobs is helping you align your roll attitude with the actual pavement. Fly a few approaches to minimums in driving rain and you’ll understand how those approach lights might emerge from the miasma off one side of the nose and at a roll angle not quite matching your own. The roll bar gives a bright visual reference as you get everything in alignment.
The flashing lights stop at the roll bar, but the center rows of five white lights continue guiding you to the runway threshold and centerline. Halfway there, 500 feet from the threshold, there is a short white bar of three lights on each side (sometimes referred to as a barrette). It’s like a mini roll bar that’s really for the Cat-II folks who need all the visuals they can get.
The inner 1000 feet of the ALSF-2 lighting also contains two strips of red lights, one on each side. These are the red side row bars mentioned in FAR 91.175 that you must have in sight to descend below 100 AGL with only the approach lights in sight. Their purpose is primarily to remind you this area is actually short of the runway. You need to cross the green threshold lights and touchdown on the real runway centerline. Cat-II and Cat-III runways have lights in the pavement that look like the ALSF-2, but those are technically part of the runway light system.
So where are the red terminating bars mentioned in FAR 91.175? They’re on an ALSF-1. In other words, you will see either the red side row bars OR the red terminating bars, but never both. They’re also explained in the video on this page, along with a plain-language explanation of the nine other approach light systems. It sounds boring, but the acronym (SSALR, MALSF, etc.) soup is straightforward code that mostly describes the ALSF-2 with parts missing. Watch the video and you can clean up on aviation trivia night.
Using the Yardstick
So far we’ve talked about how the sequenced flashers and shape of the lights might orient you towards the runway. Now that you’re an ALSF-2 Illuminati, it’s time to add measurement.
It’s no coincidence that most Cat-I ILS and LPV approaches require 2400 feet (1/2 SM) visibility and the ALSF-2 is (usually) 2400 feet long. In fact, any ILS or LPV with a visibility requirement of less than 3/4-mile must have an ALSF-2, ALSF-1, SSALR, or MALSR (see video), all of which are 2400 feet long.
When you reach 200 feet AGL on a standard three-degree glideslope, you’re about 2800 feet from the threshold. If you can see the far end of that approach light system, you have the required visibility to continue.
If you can see only to the 500-foot barrette, visibility is closer to 2300 feet. I’m not one to quibble over 100 feet, so I’d understand continuing for landing presuming I could see that far. However, I’ll reiterate: Even though the ALSF-2 provides some roll and yaw information, it says nothing about glideslope. The PAPI or VASI is about 1000 feet beyond the threshold, so fly attitude and resist changing pitch. With only 2400 feet of visibility, you probably won’t see the VGSI until the roll bar has passed under the nose.
If you reach a 200-foot DA and can’t see the roll bar, you have less than 1800 feet of visibility. RVR 1800 ILS approaches exist, but it most cases, failure to see the roll bar by DA requires executing a missed approach, even though you can see 1400 feet of the approach light system ahead of you.
It’s interesting to note that if you can’t see past the roll bar, you can’t see “the red terminating bars or the red side row bars.” So maybe a better read of FAR 91.175 (c)(3)(i) would say you could descend if you have, “… the approach light system, except if it’s an ALSF-2 and you can’t see some of those red side lights, just go around now.”
And live to see another trivia night.
Watch This Video:
“Approach Lighting Secret Decoder Ring“
Turning ‘Em On, Up, or Down
Pilots routinely flying from towered airports get casual about the brightness of the approach lights. Sometimes that means anything brighter than off. Part of every pilot’s checklist on crossing the FAF to an uncontrolled airport with pilot-controlled lighting is turning those lights up as high as they can go. Seven mic clicks ought to do the trick. You can always turn them down once you break out.
Remember, at a towered airport, you can ask the tower to turn the lights up or down as you need. If you’re nervous about acquiring the runway on approach, ask Tower if the lights are all the way up. This trick can help on a visual as well as when you’re merely having trouble finding the airport. You can also have them turn the lights down, or turn off distracting flashers, if you need.
ForeFlight Question of the Month:

It’s unusual to find pilot-controlled lighting (PCL) triggered by a frequency other than the CTAF/Unicom, but it happens. When PCL is on a discrete frequency, ForeFlight will (select all that apply):
A. List it in the frequencies information of the airport’s tab
B. List it in the frequencies that pop up when you tap the airport on the map
C. Note it on the map if the new aeronautical layer is selected
D. Not make any special note of it, assuming you’ll check the Chart Supplement (the A/FD tab) or approach chart

